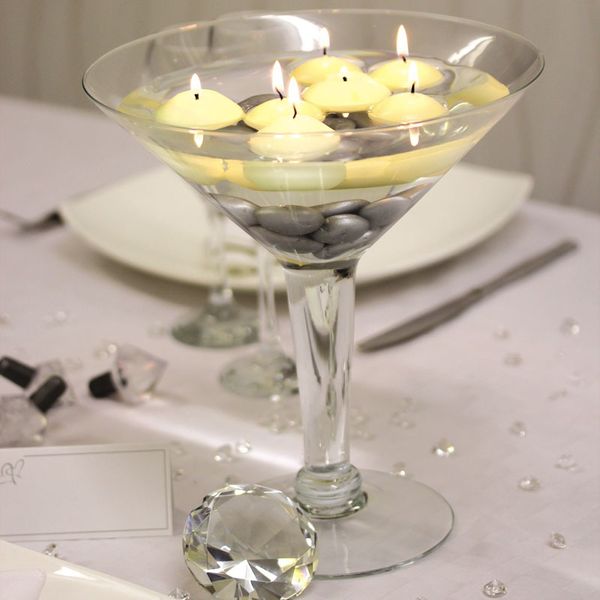
Martini Vase Centrepiece
30th Mar 2023
Martini Vase Centrepiece
Date Submitted: 16/01/2014
Author: Kevin
Time Required: 20 minutes
Category: Table Centrepiece
IF YOU LOVE IT... SHARE IT!
SummaryA short guide to create a simple centrepiece using a martini vase and some floating candles. Perfect for your table centres or as decorations around your wedding venue.
Instructions:
| 1 | This is a very simple display to make, and it can be easily customised to match your colour theme by changing the colour of the vase filler. First of all, as always I recommend getting all of the products in once place, and checking that you have everything that you need. For the glass martini vase there will likely be some residue on the glass from the packaging that is used to protect it. Therefore give it a quick wash in some hot soapy water. |
| 2 | Next step is to decide where you are placing the display. I will presume that the tables are already set, and that they just need the display setting up in the centre. The first thing to do once you have your location is to place the coloured stones into the martini vase. In this particular setup I have used a silver stones. You can change these to match your colour theme, or even use a different vase filler. The most important thing to remember is to make sure that the filler that you pick will sink into the water. Some acrylic vase fillers will actually float on top of the water, rather than sink to the base of the vase. Fill the martini vase to your desired level with the vase filler. Here I have filled it to just below halfway, but again this is a matter of preference. |
| 3 | Next step if you have your vase on the table is to fill it with water. Its best not to carry the vase around once the water is in it, in case of spillages on the table. I have used a jug of water and filled the martini vase to a couple of centimetres below the rim. |
| 4 | Now its time to add the candles. I have used seven ivory floating candles in this display. They fit perfectly in the martini which has a cup diameter of about 23cm. The key point to note here is that you want to leave some space so that the candles can move around in the bowl, rather than having the candles tightly packed together. We wont light the candles until just before the event. |
| 5 | The main feature is now setup, so its time to look at the accessories to match. I have gone for a silver glamourous theme here so I have picked diamond shaped accessories to fit in. I have used a pack of clear table diamonds to sprinkle on the table. These come with three sizes of table diamond per pack, which makes the display a little more interesting than having a single size diamond. Sprinkle the diamonds around the table. Each pack should be plenty for a table of ten people. In addition to the small diamonds I have also added a large 8cm table diamond at the base of the martini vase. These can be added to taste, and you may want to place more than one on the table. |
| 6 | Carrying on with the diamond theme, I have also added to this table some diamond shaped wedding bubbles. These bubbles have a silver cap and fit perfectly with the silver stones and table crystals that I have already used. Obviously you want one bottle of bubbles per guest, so the number that you need will depend on your table size. You can have these as an alternative to your favours or as an addition to your favours. |
| 7 | Finally the place cards. Here I have used a white place card with a silver heart theme. Again you can easily customise this part of the table by swapping for a different design, or even a different colour place card. |
| 8 | Final tip, is don't forget to have someone from the venue to light all of the candles just before you enter the room. This should create a lovely warm feeling around the tables, and ensure that the candles last for the full event. |

